HOW TO INSTALL
VENTILATION UNIT IN SMALL EKET
This guide is part of:
Welcome to the website guide of the Eket V2 build video guide.
With two separate chambers this build can do continuous supply in a very small package.
This guide is done with a small and a big eket, but you could do it with two large ones to allow longer vegging, in this case you can do the second eket for vegging with just 2 panels instead of 4.
The normal power usage for this build is below 50w total, which means less than $5/month for veg (4€) and $3/month in bloom (3€).
The new cardboard compression chamber of the blower allows for a quieter build and makes the carbon filter setup much simpler.
(The attachements below are also downloadable throughout the guide)

Because plants in veg don't have that characteristic smell yet and more like a green grassy smell; the filter is optional/ can be added later on.
There is only one LED panel in the small eket veg box, which produces very little heat - for colder climates setting the fan at the lowest speed and providing some extra heat will be appreciated by your plant.
What you'll need
Selected region:
World
Click to change
Blue Spot Soft Grip Precision Knife Set BY Blue Spot
From amazon.co.ukMake precise cuts; avoid your fingers
Great Tool For Trimming, Deburring Chiseling, Carving, Cutting and Other Hobby Craftwork;Hardened St
US$8.07
*price may vary *converted to local currencyUS$8.07
*price may vary *converted to local currencyHot Glue Gun BY TACKlife
From amazon.frSo anyway, I started blasting
Hot Melt Glue Gun is a tool for sticking Package That Can Be Used Easily,
Don't just come hobbies DI
US$13.24
*price may vary *converted to local currencyUS$13.24
*price may vary *converted to local currency3-in-1 Air Filter Replacement BY Nispira
From amazon.comSimple and efficient
- Premium 3-in-1 air filter replacement set compatible with Vornado Air Purifier CYLO50, CYLO51, and
US$13.99
*price may varyUS$13.99
*price may varyBlower & Sensor Combo BY SuperGreenTomato
From SuperGreenTomato EUExpand your grow with another chamber
Looking to expand your grow?
An extra chamber allows you to do a perpetual harvest by having plants
US$37.12
*converted to local currencyUS$37.12
*converted to local currencyDrill cable hole in the backside top right corner

Drill cable hole in the backside top right corner
Same as for the main eket;
the sensor is the biggest connector you'll need to get through so drill accordingly.
Drill exhaust hole

Drill exhaust hole
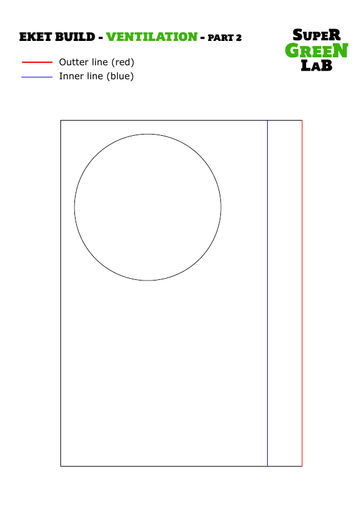
Same as the first one; print and stick the pattern in the top right corner - then drill the hole(s).
Sandpaper the surface around the hole

Sandpaper the surface around the hole
Sand before gluing.
Hot glue will stick much better on a rough area.
Don't forget to wipe off the dust before gluing.
Pass cables through cable hole

Pass cables through cable hole
Insert the cables for the blower, sensor, and LED.
It's much simpler to pass all the cables before gluing the ventilation unit in place.
Glue the ventilation unit in place

Glue the ventilation unit in place
Make sure to have hot glue all around the hole for a good seal.
Glue the carbon filter in the back

Glue the carbon filter in the back
Gluing all around the filter creates a good seal that forces all air to go through the filter.
Again, roughing-up the surface with sandpaper before gluing helps it stick better.
Drill intake holes

Drill intake holes
Drill some holes in the bottom left corner of back wall to allow fresh air to come in.
You can add a layer of dust filter to prevent dust and pests 👌
Next
Aaaaand now we're back for another cardboard craft;
the point of this one is to keep a small gap between the led panel and the surface behind.
This will help with heat dissipation from the panel.
 blower - pattern - 2.pdf